Syncthing is a free, open-source file synchronization software that enables you to synchronize files between your devices securely.
Unlike traditional cloud-based storage solutions, Syncthing is decentralized, meaning it uses peer-to-peer technology which allow you to sync files between devices without the need for traditional cloud-based storage solutions or SMB/NFS systems.
In this article, we will explore how to get started with Syncthing and utilize it to sync some files with our devices.
Getting Started
Syncthing is available for Windows, macOS, Linux, and Android, and can be downloaded here.
You will need to extract the .zip file then install from there.
If you are on Android or iOS, you can visit the links below:
Note: The iOS client is an unofficial client limited in functionality and features, but will work with files accessible through the Files app on iOS. It also limits you to 20MB of syncing before needing to purchase the ‘Unlimited file sync’ option. Keep this in mind when deciding to utilize it on iOS. For more info, refer to the FAQ and the company behind the development.
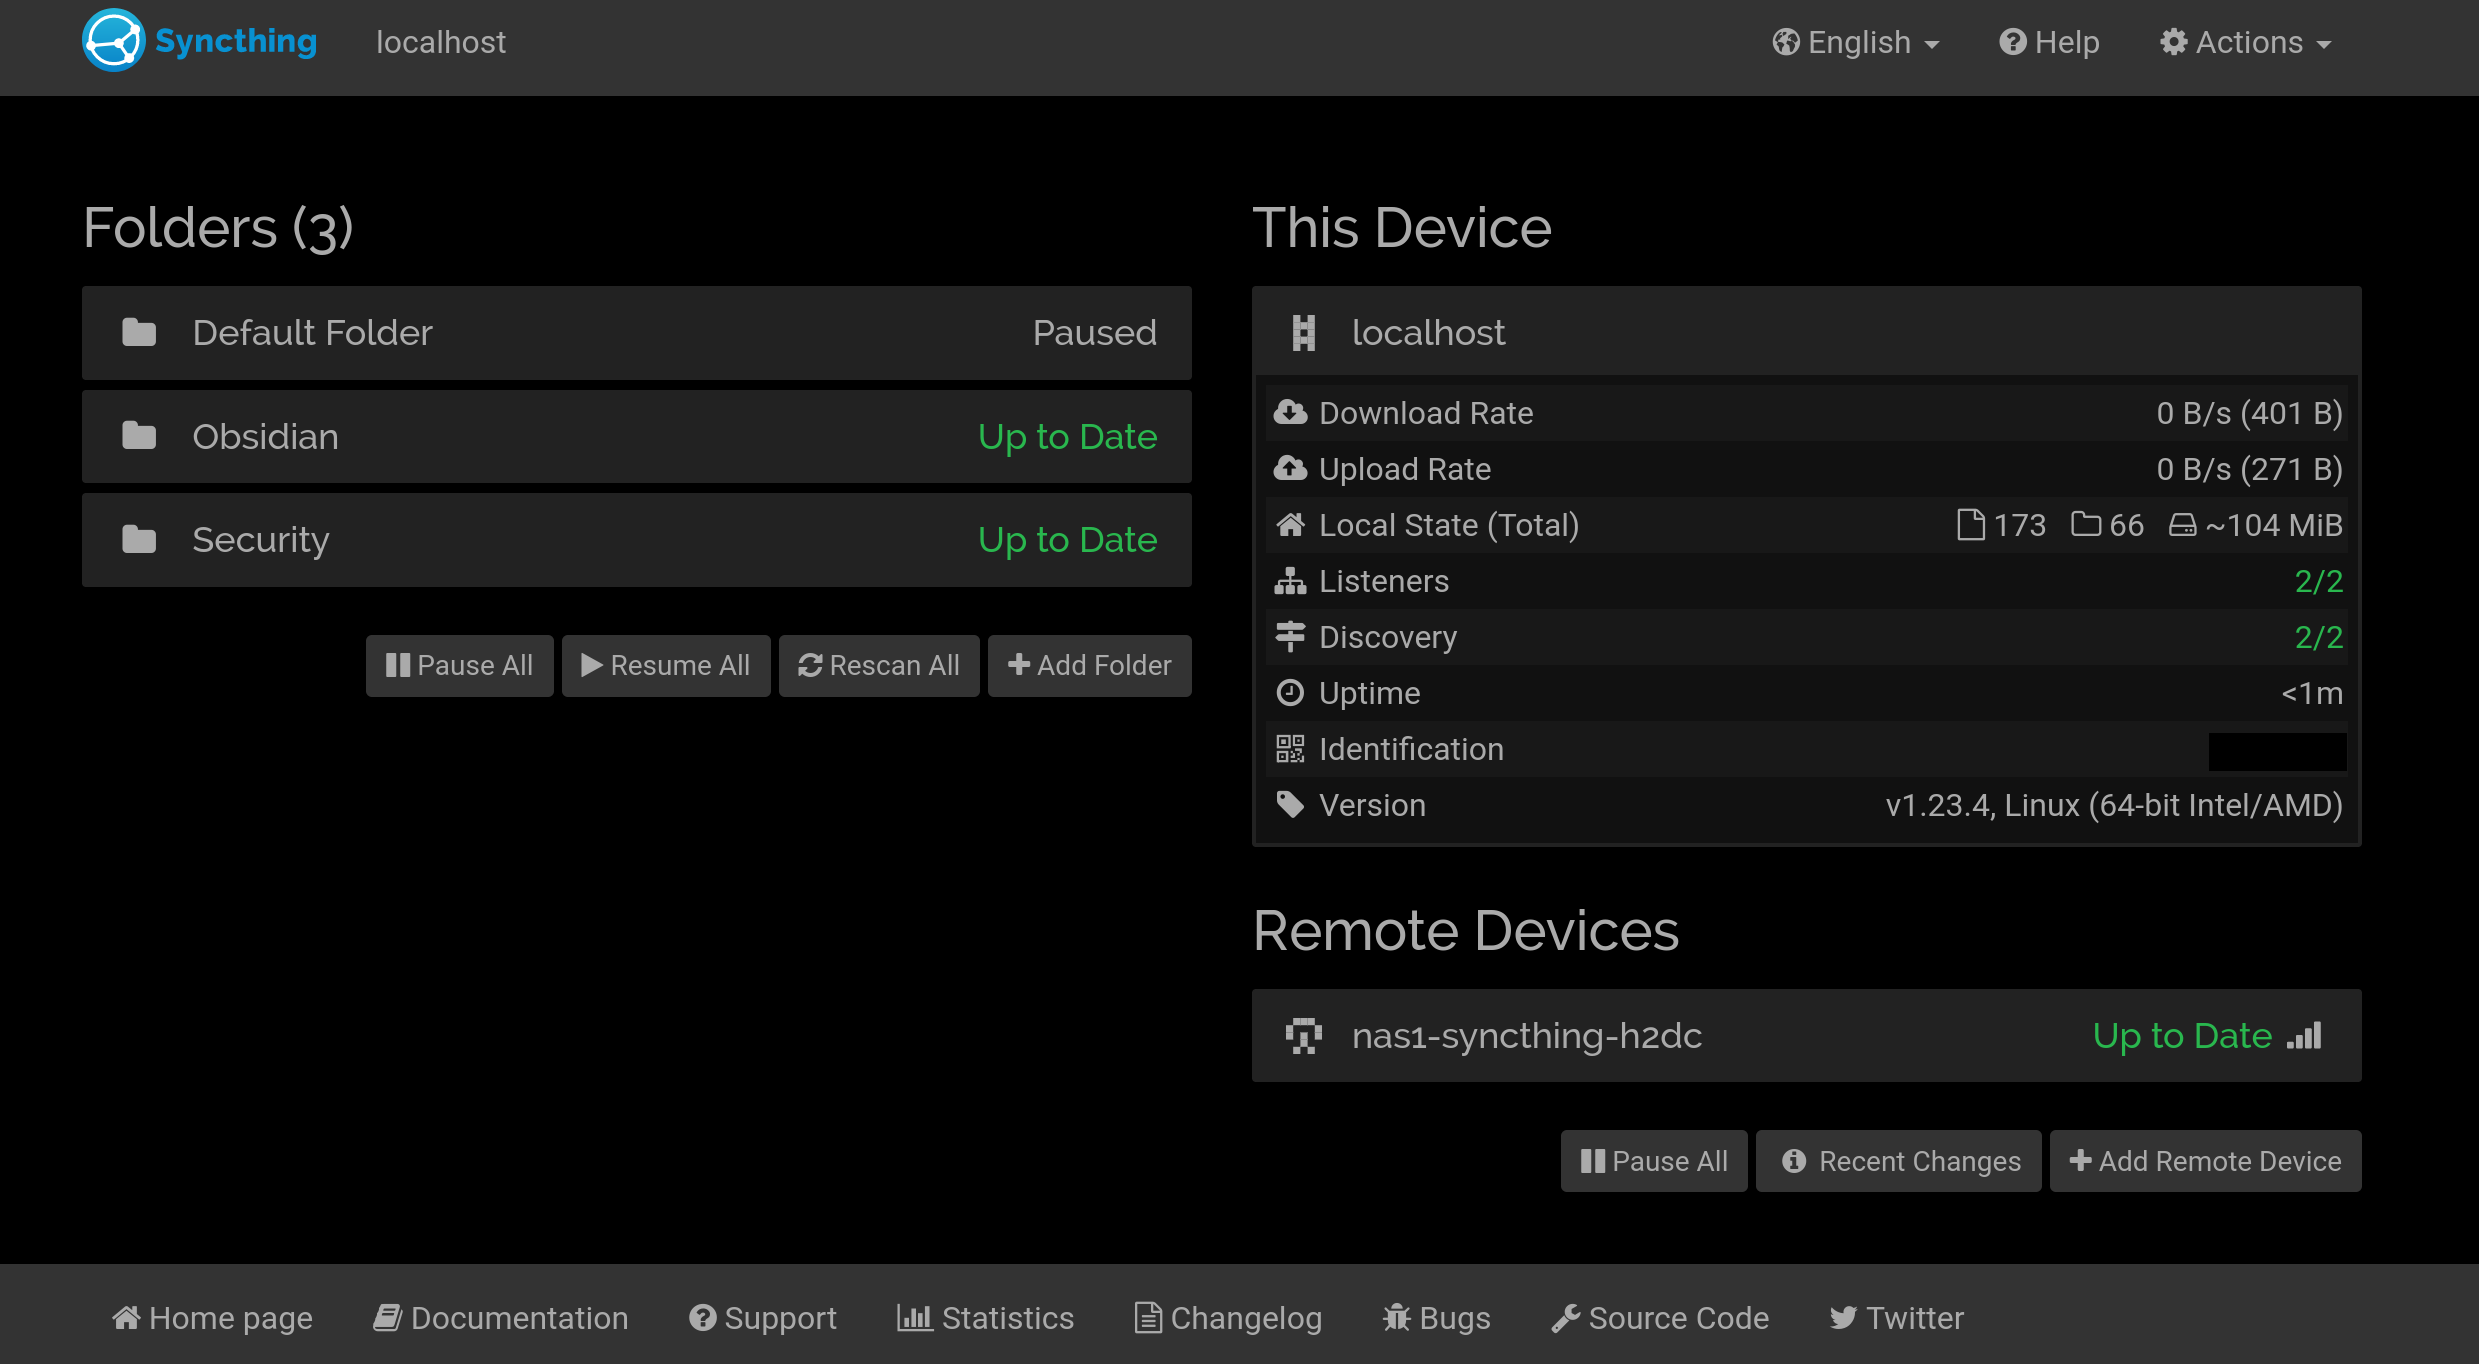
Once you have installed Syncthing, you should be able to access the dashboard by opening your web browser and navigating to http://localhost:8384.
Adding Devices
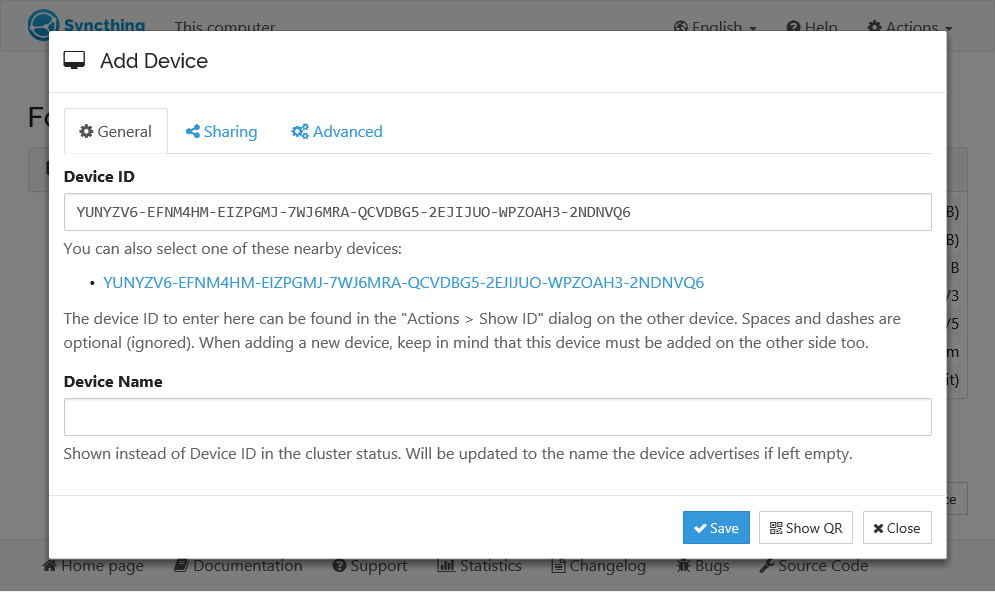
To add a device, you will need to share your device ID with the other device and enter the other device’s ID.
If you’ve setup the other device with Syncthing, you’ll likely see the ID, you can then click to auto add the device.
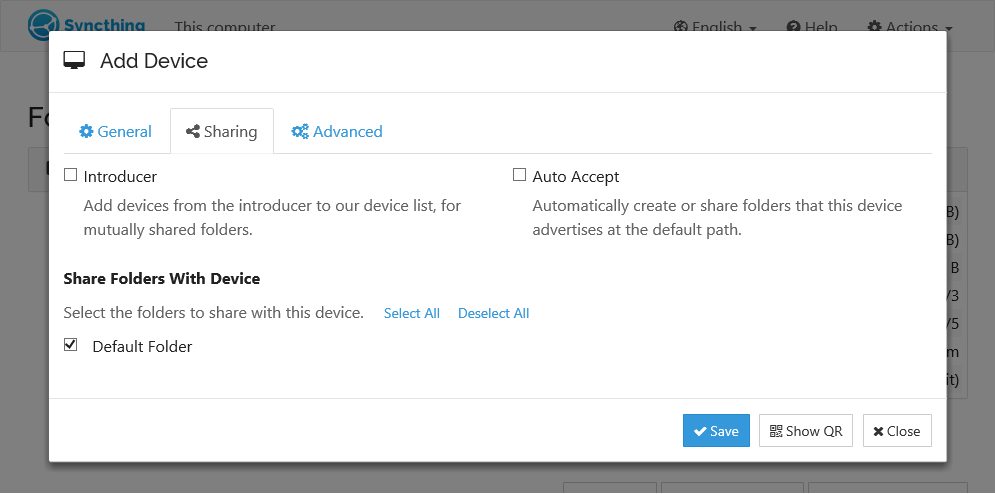
Go to the Sharing tab, and select the Folder or folders you would like to share from the remote device.
Adding Folders
To add a folder, click on the Add Folder button below the Folders section.
You can then select the folder you want to sync, give it an optional Folder Label, from there it will be added and show up on the left side of the dashboard.
Go to the Sharing tab, and select the Folder you just created. Similar to the picture from above.
Syncthing will automatically sync the files between them, ensuring that they are always up to date.
Setting up Syncthing with Docker
Docker is a popular tool for managing and deploying applications in containers.
You can easily set up a containerized version of Syncthing for a server or central device you would like to store your files on. This is handy if you already implement a NAS system and utilize Docker. It could then be used in conjunction to sync with your other devices.
Docker Run
| |
| |
Docker Compose
You can also setup syncthing with a docker compose file that they provide, make sure to modify your env variables for your PUID or PGID, as well as your volumes.
| |
You can then access Syncthing by opening a web browser and navigating to http://localhost:8384.
From here, you can set up your devices and folders just as you would with a non-containerized version of Syncthing.
Make sure to follow the getting started guide on their website, which should include more detail on how the folders and syncing operates.
Conclusion
Syncthing is a powerful tool for synchronizing files between devices securely.
By setting up a Syncthing Docker container, you can easily deploy and manage Syncthing on your machine, making it easier to sync files between devices.
With Docker, you can quickly spin up and tear down Syncthing containers as needed, making it a flexible and scalable solution for file synchronization.